



No matter how good the material is, poor installation ruins everything.
As a new flexible decorative material, MCM (Modified Inorganic Mineral Composite) soft stone requires a completely different installation approach from traditional ceramic tiles or natural stone. Many people, upon receiving the product, instinctively apply tile‑laying techniques – only to end up with hollow spots, peeling, or uneven joints, turning a quality product into a disappointing "buyer's remorse" result.
In fact, MCM soft stone installation is not complicated – but every step has its rules. From substrate preparation to wall application, from joint filling to finished product protection, any negligence at any stage can compromise the final result and long‑term durability.
This article breaks down the MCM soft stone installation process into nine key steps, combined with substrate treatment requirements and environmental control guidelines, to help you avoid common pitfalls and ensure every piece is applied firmly, evenly, and beautifully.
Installation Workflow Overview:
Substrate Inspection → Layout Marking → Material Cutting → Adhesive Mixing → Soft Stone Application → Joint Cleaning → Joint Filling → Surface Cleaning → Finished Product Protection → Final Inspection
Step 1: Material Inspection Upon Delivery
Preparation begins before materials arrive. First, verify that the model, specifications, colour, and batch numbers of the delivered MCM soft stone match the design drawings and bill of quantities. For each batch, inspect the factory certificate and performance test reports – especially freeze‑thaw resistance (100 cycles with no abnormalities) and weathering resistance (2,000 hours with no powdering) – these core indicators must meet industry standards.
Visual inspection of the material itself is equally important. The soft stone surface must be smooth, edges straight, with no chipped corners, cracks, or glaze damage. Randomly select several pieces from different cartons within the same batch to compare colours – only sign off if no colour variation is detected. If the colour difference exceeds the acceptable range, return the entire batch.
The matching adhesive is just as critical. You must use a dedicated polymer‑modified cementitious adhesive formulated for MCM soft stone products, consisting of cement, quartz sand, and water‑soluble polymer emulsion. Do not cut costs by using ordinary tile adhesives – different types of soft stone require different adhesive flexibility and bond strength. Using the wrong adhesive can lead to hollow spots or even detachment later. Upon delivery, check the adhesive's factory certificate and performance data, confirming that technical parameters such as bond strength and flexibility modulus meet the product specifications.
Step 2: Substrate Preparation – The Most Overlooked Yet Most Important Step
Many exterior material failures are not caused by the material itself but by poor substrate preparation.
The wall substrate must be solid and flat before installation. Use a 2‑metre straightedge to check – verticality deviation must not exceed 4mm per 2m, and flatness deviation must not exceed 3mm per 2m. The wall surface must be thoroughly cleaned – dust, grease, and moss must all be removed.
For renovation projects where the existing wall has tiles or paint, conduct a pull‑off test first. The substrate's tensile bond strength must be ≥0.3MPa. If there are hollow spots or peeling areas on the substrate, first repair them with a 1:3 cement mortar mix, then apply a primer to enhance adhesion.
For concrete substrates, apply an emulsion‑type primer at approximately 0.2kg per square metre. For existing tile substrates, sandblasting or mechanical grinding is required to expose surface pores, allowing the adhesive to penetrate. If the substrate has a water absorption rate exceeding 15% , moisten it with water 24 hours in advance, but wipe off any surface moisture with a dry cloth 1 hour before installation.
Step 3: Layout Marking
Before formal installation, snap control lines on the wall. Horizontal control lines should be set every three storeys , with vertical control line spacing not exceeding 1.5m. First, use computer‑aided layout planning to determine joint widths – typically 3 to 5mm – and mark cutting dimensions for tiles around door and window openings.
During layout planning, ensure that full tiles are used at internal and external corners , and that cut tiles are no narrower than 100mm. The layout plan should clearly mark the position and cutting dimensions for each row of tiles, to avoid on‑the‑spot modifications that cause material waste and colour discrepancies.
Step 4: Material Cutting
MCM soft stone cutting is much simpler than stone or tile cutting. Regular straight cuts can be made with a dedicated cutting knife (fitted with a tungsten carbide blade). More complex irregular cuts can be made with a hand‑held cutting machine. For curved sections, the soft stone's inherent flexibility allows for cold bending , with a minimum bending radius of 50mm.
Key cutting points: First, the cut edge must be smooth and burr‑free – otherwise the surface will be uneven after installation, with noticeable height differences at joints. Second, for irregular sections, it is best to create a template first , trace the shape onto the back of the soft stone, and then cut – this ensures precision and minimises waste. Third, before batch cutting, cut a few test pieces to confirm that colours and textures align naturally.
Step 5: Adhesive Mixing and Application
The adhesive mix ratio directly determines bonding performance. Using a water‑to‑adhesive ratio of 1:4 by weight , pour the adhesive powder into clean water and mix with an electric mixer for 3 to 5 minutes until lump‑free. After mixing, let it stand for 5 minutes to cure, then mix for another 2 minutes. Note that each batch must be used within 2 hours – during hot summer conditions, shorten this interval. Never add water to re‑mix hardened adhesive for reuse.
Apply the adhesive using the full‑coverage method. Use a notched trowel to spread the adhesive evenly on the back of the soft stone, with a thickness of approximately 3mm – a trowel with a 6mm notch depth is recommended. The coverage rate must reach ≥95% , with no blank areas. Once the adhesive is applied, the tile must be placed within 15 minutes , otherwise a skin will form on the surface and reduce bond strength.
Step 6: Application Process
Apply tiles from bottom to top, and left to right. Align the soft stone with the pre‑marked control lines and press gently into place. Use a rubber mallet to tap lightly from the centre outward, expelling air between the adhesive and the substrate. Use round steel bars to help control joint widths between adjacent tiles, ensuring uniform gaps.
During installation, continuously check flatness with a straightedge – any deviation exceeding 2mm must be corrected immediately. Within 24 hours of installation, the surface must not be exposed to rain or physical impact. During hot summer periods (11:00 to 15:00), sun‑shading measures are required to prevent the adhesive from drying out too quickly and losing bond strength.
Step 7: Joint Filling
After the soft stone is applied and has initially cured, clean and fill the joints. First, use a joint‑cleaning tool to remove any residual adhesive from the gaps, then fill with a low‑alkaline joint filler that matches the soft stone colour. The filling must be full and dense, with no voids or omissions. After filling, use a sponge to wipe along the joint direction for a smooth finish, being careful not to stain the soft stone surface.
Step 8: Finished Product Protection
After all installation work is completed, protect the finished surface. Cover the soft stone with protective film or temporary barriers to prevent contamination or damage from subsequent trades. Pay special attention to areas prone to impact, such as door and window openings and wall corners. Protection measures must remain in place until the final handover inspection.
Key Environmental Control Requirements
The installation environment temperature must be controlled between 5°C and 40°C. Below 5°C, the adhesive hydration reaction slows down and strength development is compromised; above 40°C, water evaporates too quickly and the adhesive may crack. Operations must stop when wind speeds reach Force 5 or above, or during rain. During hot summer periods (11:00 to 15:00), sun‑shading measures are required.
Treatment Requirements for Different Substrates:
Concrete/Masonry Substrates: Apply primer at approximately 0.2kg per square metre
Existing Tile Substrates: Sandblast or grind to expose surface pores
Existing Paint Substrates: Verify adhesion strength – remove if insufficient
Insulation System Substrates: Confirm insulation board pull‑off strength ≥0.1MPa
Schedule Comparison: MCM Soft Stone vs. Traditional Stone Cladding
In terms of construction scheduling, MCM soft stone offers significant advantages over traditional stone cladding. For an 18‑storey residential building with a facade area of approximately 20,000 square metres , traditional stone cladding requires about 120 labour‑days , including layout, sub‑frame installation, panel slotting, hanging, and joint sealing. MCM soft stone installation requires only about 70 labour‑days – a 40% reduction in project duration. Additionally, without the need for sub‑frames and extensive on‑site cutting, construction waste is also substantially reduced.
Choose the Right Product, and Installation Becomes Easier – OlinMat MCM Soft Stone
Even with perfect installation techniques, if the product quality itself falls short, the results will still be disappointing. OlinMat MCM Soft Stone ensures quality from the source – using premium eco‑friendly inorganic raw materials with stable performance and a rich variety of textures and colours, replicating natural stone effects including slate, split bricks, granite, and more. More importantly, OlinMat provides matching dedicated polymer‑modified cementitious adhesives and clear technical installation guidance – helping contractors maintain quality control throughout the entire process, from materials to workmanship, and avoiding issues such as hollow spots or detachment caused by mismatched products and adhesives.

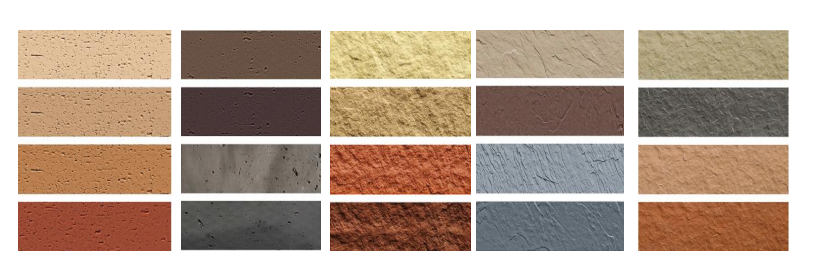
We have a showroom and in‑stock warehouse in Egypt – customers can visit to view samples and experience product texture and flexibility firsthand. Whether for exterior wall projects, renovation works, or interior decoration, OlinMat delivers professional product solutions and technical support.
📩 Interested in procurement or project collaboration? Let's talk!
Please reach out to us through our official website or social media channels – we'll respond promptly. OlinMat looks forward to partnering with you to deliver quality and durability to every project.
Let me know if you need an Arabic version or any further adjustments.